Will Raywood, author

  • Home
  • Books
    • Jamie Genius Writes a Novel
    • Trust Your Story
    • Natural Laws of Story
    • Extras
    • Free e-book
  • Newsletter
  • Blog
  • My Story
  • About
  • Privacy Policy

Can You Outline Like J.K. Rowling? Try My Simple 3‑Step Method

10 August 2026 by willraywood.com Leave a Comment

When I wrote my first novel, I had no idea how to plot. The result? I wasted months rewriting it, going in circles, fixing one problem only to create three more. When I discovered J.K. Rowling’s plot grid, it transformed how I outline my stories.

You know that sinking feeling you get halfway through a draft? The one where the ten brilliant subplots you dreamed up have twisted into a tangled, confusing mess? I’ve been there. J.K. Rowling was, too, until she developed a deceptively simple method that changed everything.

While some writers and theorists spend years searching for the “secret structure” behind great novels, I almost laughed when I first saw Rowling’s handwritten grid. It was so straightforward. But here’s what most people miss when they glance at that now-famous photograph:

Rowling’s secret isn’t the grid itself. It’s how she uses it.

She doesn’t just map the events of the story; she uses the grid to engineer emotional momentum.

Sure, creating a plot grid takes work. It might even look intimidating at first. But trust me, the work you put in upfront will save you months of painful rewrites. This tool helps you write faster, guiding you to a finished draft in weeks instead of months, all while ensuring your story hits every emotional beat.

It’s a double win!

Before we dive in, let’s tackle the fundamental question. Do you even need to outline your story? Can’t you just write by following inspiration wherever it leads? After all, famous writers like Stephen King and George R. R. Martin prove you can find massive success without a detailed plot.

The good news is that Rowling’s technique works for both approaches. Plotters devise a detailed outline before they start drafting. For them, the grid is a blueprint. Discovery writers can do what’s called reverse outlining. After finishing a draft, they create an outline from the existing text. This helps them see the story’s structure at a glance, find plot holes, and ensure every thread makes sense.

A Long History of Visual Outlining

The idea of structuring a story with a visual map is nothing new. Great writers have been doing it for ages. Vladimir Nabokov wrote Lolita on index cards. While traveling across the United States with his wife to study butterflies, he filled out cards for individual scenes and shuffled them daily, exploring different narrative possibilities.

William Faulkner covered the walls of his study with pages outlining the plots of his novels.

Joseph Heller created large charts while writing Catch-22 to track character appearances and timelines in his famously nonlinear story.

Modern novelists and screenwriters use everything from corkboards to spreadsheet trackers, all of which serve the same function as Rowling’s grid. Now, let’s see how you can turn this tool into your storytelling superpower.

Step One: Build the Story Grid

At its core, Rowling’s plot grid is a simple story matrix. Across the top, she listed chapters or time segments. Down the left side, she listed different story threads.

Start by creating a simple table. For the columns, I recommend starting with broad story sections rather than individual chapters. Think in terms of five acts or the main story beats: Setup, Rising Action, Crisis, Climax, and Resolution.

For the rows, list your key story elements. Your initial grid might look something like this:

  • Setting: Where and when does the story take place? (Especially useful if characters travel).
  • Protagonist’s Arc: The core emotional journey of your hero.
  • Main Themes: The underlying ideas you want to explore.
  • Main Plot: The primary sequence of events.
  • Subplot A, Subplot B, etc.: Secondary storylines.

As you fill this out, your goal is to get a bird’s-eye view of your story. The immediate benefits are obvious:

  • See the whole story at a glance, making it easy to spot plot holes.
  • Track multiple plotlines to ensure they are properly set up and resolved.
  • Plan your foreshadowing and payoffs with intention.
  • Control your pacing and maintain narrative momentum.
  • Experiment with structure by rearranging scenes without losing the big picture.

These are great, but they’re just surface-level benefits. If readers don’t care about your story, the most perfect plot in the world won’t save it. The magic begins when we focus on emotion.


Want to master the art of emotional storytelling? Subscribe to my free newsletter for exclusive insights into the art and science of narrative. You’ll get a fascinating e-book as a welcome gift!

Newsletter

Step Two: Map the Character’s Emotional Journey

Science shows that engaging stories trigger a cascade of neurochemicals in our brains: dopamine, oxytocin, cortisol, and endorphins. Our brains are wired to respond to narrative. Falling in love with a story is like falling in love with a person; the logical part of our mind takes a back seat, and we get to bask in that neurochemically induced bliss.

This is how you hook readers for life.

The key is understanding one simple truth: what matters isn’t the events of the story, but how those events affect the characters and, by extension, the audience. If a story is about a girl and her puppy, then that puppy becomes the most important thing in the universe. What happens to the puppy—and how the girl reacts—matters more than any broader event. There may be a revolution, a war, a natural disaster, or even an AI takeover or alien invasion. But to make the story compelling, the author must filter every event through the character’s emotional experience.

The hidden power of the plot grid is its ability to map this experience. Don’t just use it as a checklist for plot points. For every event, ask: how does this change the character?

Let’s look at Harry Potter and the Philosopher’s Stone:

  • Plot Event: Harry receives a mysterious letter from Hogwarts.
  • Emotional Impact: Before this, Harry felt neglected and invisible. The letter’s arrival changes everything. More than a plot point, it’s the moment Harry first dares to hope that he might belong somewhere. That feeling becomes the emotional engine that pulls the reader into the story.

Stories are always about characters and their journeys. The distinction between “plot-driven” and “character-driven” stories is misleading. Characters react to the events of the plot, but their reactions, in turn, influence the plot’s direction.

To prove it, try a thought experiment. Take a supposedly plot-driven classic The Count of Monte Cristo, where Edmond Dantès escapes prison, finds a treasure, and seeks revenge. Now, replace him with Jean Valjean from Les Misérables. Would the plot unfold the same way? Of course not. Valjean would likely use the treasure to help the poor and seek justice, not vengeance.

So, both plot and characters are equally important in moving the story forward.

In Step 2, add a row called “Protagonist’s Emotional State” to your grid. Here, you’ll map how their feelings change in response to the plot. An emotional progression could look like:

Hope → Doubt → Despair → Resilience → Triumph

This ensures your story isn’t just a sequence of “what happens next,” but a meaningful journey of inner change.

Step Three: Create a Detailed Story Outline

Now that you have your big picture framework, you can zoom in. Add a column for every chapter of your book. Don’t worry if you don’t know the final chapter count; you can always adjust this later.

As you populate each cell, make sure every chapter is doing its job. Ask yourself:

  • What is the character feeling now?
  • What changes emotionally in this scene?
  • What belief about themselves or the world is being challenged?

If several chapters go by with your protagonist feeling the same way, the story can feel emotionally stagnant, even if dramatic things are happening on the surface. This “emotional flatness” is a main reason readers disengage.

To avoid this, weave your main themes into the plot and the character arc. The best storytellers integrate these so seamlessly that the reader feels the theme’s power without consciously recognizing it until a climactic moment of clarity. For example, in Harry Potter and the Philosopher’s Stone, the theme of love and sacrifice permeates the entire story. Harry’s mother, Lily Potter, sacrifices herself to save him from Lord Voldemort. That act of love becomes the force that not only protects Harry but shapes his entire journey.
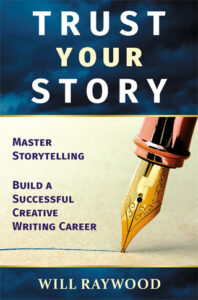
Book cover: Trust Your Story: Master Storytelling and Build a Successful Creative Writing Career by Will Raywood

I know that creating a detailed outline can feel daunting, but it can also be very fun and empowering. It’s a living document, a tool meant to help, not constrain you. Go back and tweak it whenever inspiration strikes.

Ready to take your writing career to the next level? If you want to create unforgettable characters and stories readers will cherish, check out this book: Trust Your Story. It’s a comprehensive guide covering everything from core storytelling techniques to devising a winning author strategy.

So, what are your thoughts? Have you tried Rowling’s plot grid or similar methods? I’m curious to hear what works for you. Leave a comment below!
Filed Under: Creative Writing Tagged With: creative writing advice, first draft tips, JK Rowling, novel outlining, science of storytelling, story plot, writing productivity

The Sanderson System: 7 Steps to Writing a Blockbuster Novel

5 August 2026 by willraywood.com Leave a Comment

I used to consider myself a slow writer. Whenever I heard about authors who finish their novels in less than a month, I was skeptical. Surely such a feat requires exceptional skill… and maybe a few sleepless nights. Not for me, thanks very much.

I’m no writing machine, I told myself. I need inspiration. I need time to mature my story outline, find my characters’ voices, and redraft the first chapter a dozen times for good measure.

Yet, as an experiment, I applied the writing method I’m about to present and… to my surprise, it worked. Instead of a full year, I drafted a novel in just a few weeks. And you know what? The book turned out quite well. It garnered good reviews and sold decently.

Any author can learn to write faster with the right techniques. In fact, drafting quickly can improve your story and your prose, for reasons I explain in my article about Stephen King’s routine. Give it a read.

But this post is about another author, a highly successful one: Brandon Sanderson. Whatever one might think of his books, we can’t deny their popular appeal. In 2023, he raised a record‑breaking $41.7 million on Kickstarter for four new novels. Some readers pledged hundreds of dollars for a single campaign.

George R. R. Martin divides writers into two camps: architects, who design an outline before drafting, and gardeners, who plant the seed of a story and discover its shape as it grows. Sanderson outlines extensively.

I’m (usually) an architect. I’ve found that the best way to get the kinds of endings I like, I have to know where I’m going before I start.

He needs to know the story’s conclusion before drafting. He admits, “I write for endings.” His outlines are engineered so every plotline converges toward a single climactic moment. He dislikes rewriting and wants his first draft to be as close to final as possible, in contrast to discovery writers like Martin or King, who revise heavily.

That said, Sanderson balances planning with improvisation through what he calls a “floating outline.” His “Points on the Map” philosophy gives him enough structure to avoid getting lost, yet enough freedom to invent along the way. I analyzed his method and broke his process into seven steps.

Step 1. Imagine major scenes

Once you have a story idea, visualize the big moments, like emotional climaxes, plot turns, major character revelations. Some writers start with themes; others begin with the mood and core emotions of their story‑in‑the‑making. Either way is fine. Use whatever method drives your imagination.

These major scenes become the “points” your story must reach. To ensure your story engages your audience, define the main conflict as early as possible. It can be external, like an existential threat or a major challenge for the protagonist, internal, or both.

Sanderson does his worldbuilding before drafting, and that’s a wise approach. Drafting and worldbuilding at the same time will slow you down. You don’t need a full compendium before writing, just enough information about the key elements, like the main conflict and character arcs. The world exists to support the narrative, so resist the temptation to invest too much time in aspects that won’t matter to the plot.

Step 2. Divide the book into broad parts

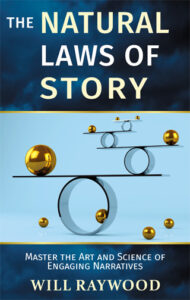
Book cover: The Natural Laws of Story: Master the Art and Science of Engaging Narratives by Will Raywood

Some writers prefer the three‑act structure; others lean toward its five‑act cousin, the Hero’s Journey, or different frameworks entirely. This technique works regardless of the number of acts. Think of your plot as a living organism and don’t force it into a rigid template just to follow convention. You might end up with three acts, four, or even six. Don’t worry about the number at the start, you can adjust later as your outline develops.

Regardless of structure, every story needs a few essential elements: setup, inciting incident, rising action, crisis, climax, and resolution. You can add optional beats like a midpoint, falling action, or denouement. But your first task is to visualize the overall shape of your story and identify its key turning points, the moments that define the emotional arc.

For more details on story structure and outlining methods, check out my guide The Natural Laws of Story. You’ll find plenty of examples from famous works and exercises to help you practice.

Step 3. Map out the scenes into an outline

The order of your scenes and where they fall in the novel matters. You want to create an addictive experience for your readers, where every setup leads to a buildup and resolves with a satisfying payoff. Your most dramatic scene should be the climax, usually toward the end of the story, in the final act.

Make sure all your scenes follow a logical progression. One proven method is to raise the stakes progressively. Each act ends with its own climax, a moment of heightened dramatic intensity that leads naturally into the next act, where the stakes escalate again.


Subscribe for my newsletter for exclusive insights into the art and science of narrative and receive a free e-book as a welcome gift!

Newsletter

Step 4. Build bullet‑point lists for each story beat

These bullet points include:

  • Plot steps that must happen beforehand
  • Character progression beats
  • Foreshadowing or mystery‑setup beats

These points are reminders, not commandments. They exist to keep you oriented, not to constrain you. Your outline is a living structure meant to evolve as you develop it and draft your manuscript.

The early acts of your book will usually have more bullet points than the later ones. That’s normal. Even if you’re an architect, you should leave yourself and your characters room for discovery and exploration. As you draft, revisit your outline regularly and add new bullet points.

These new points help you map out subplots, secondary character arcs, and—importantly—build connections between all the elements of your story.

Step 5. Outline every chapter before drafting

This step is optional, but it will dramatically speed up your drafting. Truly. It’s the difference between writing a novel in three months and writing one in a single month. The secret? Granular outlining.

The fastest, most productive writers outline not only every act but every chapter. Each chapter is a mini‑story with its own setup, conflict, rising action, and climax. Outline each chapter with a few bullet points, just as you did for the acts in the previous steps. These points will act as road posts and guide you during drafting.


If you’d like to support my work and see more articles and videos like this, check out my books, for example the story about a disastrously misguided debut novelist.

Come for the comedy, stay for the cautionary tale!


Step 6. The ending grows more powerful during drafting

Everything you do should contribute to building dramatic tension that releases during the climax. Even if you had a strong ending in mind back in Step 1, you can always strengthen it while drafting.

Imagine the plot as an elastic band, the band representing the tension and suspense in your story. As the narrative progresses and conflicts intensify, the elastic stretches further. The audience becomes more invested, anticipating the release of that tension. The climax is the moment when the band reaches its limit and snaps back. This release provides a powerful emotional payoff as the tension built throughout the story resolves. The snap mirrors the falling action and resolution that follow, as the characters and narrative return to equilibrium.

Step 7. Revise the manuscript

Like many writers, I used to dread revisions. Now I enjoy them. This is where you turn a rough diamond into something that shines… or at least something you’re not embarrassed to share.

Every writer develops their own revision method. It’s a topic I discuss in other posts, so I’ll be brief here. If you’ve followed all the previous steps, you already have a functioning structure, so revisions focus more on pacing, style, and polish rather than fixing character arcs or rebuilding the plot from scratch.

If you’ve done your job well, you don’t need to “kill your darlings.” No grim task required. That famous advice applies mostly to discovery writers like Stephen King, or gardeners, as GRRM calls them.

But what do you do if you find plot holes? Well, that topic deserves its own article. Stay tuned, and don’t forget to subscribe to my newsletter so you never miss important updates.

Newsletter

Filed Under: Creative Writing Tagged With: Brandon Sanderson, creative writing advice, first draft tips, novel outlining, plotters vs pantsers, Stephen King, story plot, writing productivity

FOLLOW ME

Newsletter | Goodreads | YouTube

Copyright Will Raywood, 2025

Copyright © 2026 · Agency Pro on Genesis Framework · WordPress · Log in